


When it comes to maintaining the appearance of your vehicle, detailing is essential. Polishing not only enhances the shine of your car’s paint but also helps in removing minor scratches and imperfections. For beginners, this process may seem daunting, but with the right tools and guidance, anyone can achieve professional-looking results from the comfort of their home.
Before diving into the polishing process, it’s crucial to familiarize yourself with the necessary tools and techniques. You’ll need a good-quality dual-action polisher, polishing pads, and a variety of compounds suited for different paint conditions. Understanding the purpose of each tool will make your detailing experience smoother and more effective.
Furthermore, having the right environment at your home can significantly impact the outcome of your polishing efforts. Ensure you work in a shaded area to prevent the paint from heating up too quickly and to avoid streaks in the finish. With these tips and the proper preparation, you’ll be well on your way to achieving a stunning, high-gloss finish on your vehicle.
Choosing the Right Polish for Your Vehicle’s Finish

Selecting the appropriate polish is crucial for achieving an impressive finish on your vehicle. The type of polish you choose can significantly influence the outcome of your detailing project. Here are some essential factors to consider:
1. Understand Your Vehicle’s Paint Type
Different vehicles come with various paint finishes, including matte, glossy, or ceramic coatings. Before purchasing a polish, identify the specific type of finish on your car. Always choose a polish that is compatible with your vehicle’s paint type to avoid any damage.
2. Determine the Level of Correction Needed
Polishes are available in different abrasiveness levels. If your vehicle has minor scratches and light imperfections, a finishing polish might suffice. For deeper scratches and substantial oxidation, an aggressive polish may be necessary. Assess the condition of your car’s surface to select the right level for your needs.
3. Consider the Application Method
Polishes can be applied by hand or with a machine. If you’re a beginner, starting with a less aggressive polish that can be easily applied by hand may be the best approach. However, using a dual-action polisher can yield superior results and help you achieve a more professional finish. Ensure you understand the equipment required for your chosen method.
4. Read Reviews and Test Products
Research various products by reading reviews from other car owners who have undertaken DIY polishing at home. Look for polishes that have received positive feedback for ease of use and effectiveness. Testing small areas with sample products can help determine which polish meets your expectations.
5. Evaluate Additional Features
Some polishes feature additives that enhance gloss or provide protection against external elements. Look for polishes containing wax or sealants that can offer extra durability and provide your vehicle with a long-lasting shine.
By taking these factors into consideration, you can confidently choose the right polish for your vehicle’s finish, ensuring that your DIY detailing efforts yield impressive results.
Essential Tools and Accessories for Home Car Detailing
When it comes to home car detailing, having the right tools and accessories is crucial for achieving professional results. Below are some essential items you should consider for your detailing kit.
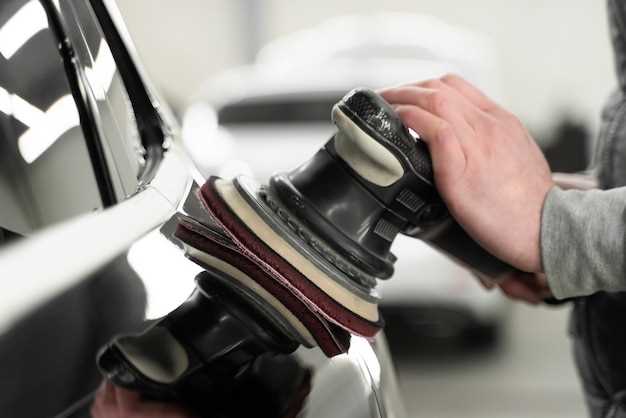
- Polisher: An electric polisher is vital for applying polish evenly across the car’s surface. It reduces the risk of swirl marks compared to hand polishing.
- Foam Polishing Pads: These pads work well with polishers and are designed to provide a smooth finish while minimizing friction.
- Detailing Brushes: Use soft detailing brushes to clean tight spaces and intricate areas of your car, such as vents and trims.
- Microfiber Towels: High-quality microfiber towels are key for buffing polish and drying surfaces without scratching the paint.
Along with the main tools, consider the following accessories:
- Car Wash Soap: A pH-balanced car wash soap helps lift dirt and grime without stripping existing wax or sealants.
- Claying Kit: A clay bar can remove embedded contaminants from the paint, leaving a smooth surface ready for polishing.
- Sealants and Waxes: After polishing, applying a sealant or wax protects the paint and enhances the shine.
- Buckets: Use two buckets – one for washing and another for rinsing – to reduce the risk of scratches from dirt particles.
- Vacuum Cleaner: A good vacuum can help you clean the interior thoroughly, removing dust and debris from carpets and upholstery.
By equipping yourself with these essential tools and accessories, you’ll be prepared to tackle home car detailing with confidence and achieve impressive results.
Step-by-Step Guide to Achieving a Professional Shine
Achieving a professional shine on your vehicle can be easier than you think, especially with the right tools and techniques. Follow this step-by-step guide to enhance your car’s appearance with effective polishing and detailing.
Step 1: Gather Your Tools
Before you begin, collect all necessary tools and materials. You will need:
- Car polish
- Dual action polisher or buffer
- Polishing pads
- Microfiber towels
- Clay bar kit
- Detailing spray
Step 2: Prepare the Surface
Start by washing your car thoroughly to remove dirt and grime. Use a high-quality car shampoo and rinse well. After washing, dry the vehicle with clean microfiber towels. This step is crucial for preventing scratches during the polishing process.
Step 3: Inspect the Paint
Examine the car’s surface for scratches, swirl marks, or oxidation. Identifying the areas that require more attention helps target your efforts effectively. You might also conduct a paint depth test if you’re working with a clear coat.
Step 4: Use a Clay Bar
To prepare your car for detail work, use a clay bar to remove embedded contaminants from the paint surface. Spritz the detailing spray onto a small section of the paint and gently glide the clay bar over the area. This will ensure a smoother surface for polishing.
Step 5: Apply Car Polish
Choose an appropriate polish based on your car’s paint condition. Apply a small amount of polish onto a polishing pad. Work in sections, starting with a section about 2 feet square. Use the dual action polisher at a low speed to spread the polish evenly.
Step 6: Polish the Surface
Gradually increase the speed of the polisher and work in overlapping motions. Don’t press down too hard; let the tool do the work. Continue polishing until the cloudiness from the polish clears, leaving a glossy finish.
Step 7: Buff the Residue
After polishing each section, use a clean microfiber towel to wipe off any remaining polish residue. This step ensures a crystal-clear shine and reduces the risk of any polish streaks.
Step 8: Final Inspection
Once you have completed polishing, take a step back and inspect your work. Look for any missed spots, swirl marks, or uneven surfaces. If necessary, repeat the polishing process on those areas to achieve that perfect shine.
Enjoy your freshly polished vehicle! With practice and the right tools, you’ll be able to achieve a professional look on your own.


