


Dealing with unsightly chips in your walls or furniture can be a frustrating experience. Whether it’s from accidental bumps, wear and tear, or even a mischievous pet, these small imperfections can disrupt the overall appearance of your home. Fortunately, you don’t need to hire a professional to restore your surfaces to their former glory. With just a few simple steps and the right tools, you can easily tackle these minor paint repairs yourself.
The key to successfully fixing paint chips lies in the use of a touch-up method that ensures color consistency and smoothness. One of the most efficient tools for this task is a paint pen, designed specifically for small repairs. These pens contain a concentrated paint formula that makes application quick and precise, allowing you to achieve professional-looking results without the hassle of traditional painting techniques.
In this article, we will guide you through the straightforward process of repairing small paint chips at home. From selecting the right color to applying the paint pen, you’ll learn everything you need to restore your surfaces seamlessly. Say goodbye to those pesky chips and hello to a refreshed and polished home!
Choosing the Right Touch-Up Pen for Your Paint Color

Selecting the appropriate touch-up pen is crucial for effectively repairing small chips in your paint. The first step is to identify the exact color of your existing paint. Many manufacturers label their paints with specific codes, so referencing the paint can or contacting the retailer may help in finding an exact match.
If a color code is unavailable, consider taking a small sample of the paint to your local hardware store. Most stores offer color matching services that can help you find a touch-up product that closely resembles your current paint. Make sure to test the matched color on a hidden area of the surface before proceeding with repairs.
When shopping for a touch-up pen, pay attention to the finish as well. Paints can have different sheens–matte, satin, gloss, or semi-gloss. Selecting a pen that matches not only the color but also the finish will ensure a seamless repair that blends perfectly with the surrounding area.
Additionally, check the pen’s tip type. A fine point is ideal for precise application in smaller chips, while a broader tip may be more suitable for larger areas. Finally, review the product’s drying time and durability, as some pens may require additional topcoats for lasting results.
Step-by-Step Guide to Applying Touch-Up Paint on Chips
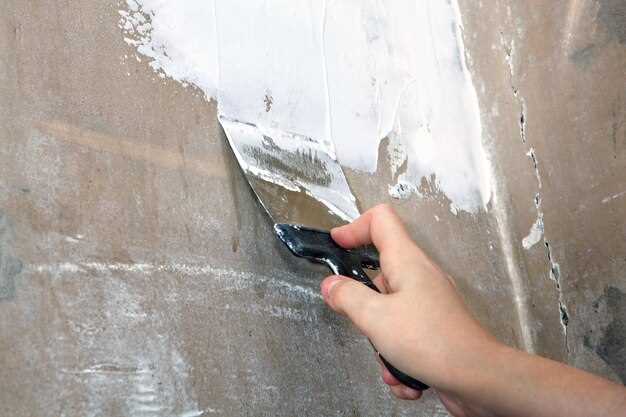
Repairing small paint chips can significantly enhance the appearance of your walls or furniture. Follow these simple steps to effectively apply touch-up paint on chips.
Step 1: Gather Your Materials
Collect all necessary materials: touch-up paint that matches the original color, a small paintbrush or a touch-up pen, painter’s tape, a fine-grit sandpaper, a clean cloth, and a paint primer if needed.
Step 2: Prepare the Area
Clean the area around the chip with a damp cloth to remove dust and debris. Allow it to dry completely. If the chip is large or rough, gently sand the edges with fine-grit sandpaper to create a smooth surface for better adhesion.
Step 3: Apply Primer (if necessary)
If the chip has exposed raw material, such as wood or drywall, apply a thin coat of primer to the affected area. This step ensures better coverage and prevents the paint from soaking into the bare material. Allow the primer to dry according to the manufacturer’s instructions.
Step 4: Apply Touch-Up Paint
Using a small paintbrush or touch-up pen, carefully apply the touch-up paint to the chip. Start at the center and work your way outward to avoid overfilling the area. Use light strokes to blend the paint with the surrounding surface.
Step 5: Allow to Dry
Let the first coat of paint dry completely. Check the manufacturer’s instructions for drying times. If the chip is still noticeable after the first coat, apply a second coat following the same technique and allow it to dry.
Step 6: Finish and Clean Up
Once the paint is fully dry, inspect the repair. If necessary, lightly sand the area to achieve a smooth finish. Clean up any excess paint from your tools and store remaining touch-up paint for future repairs.
By following these steps, you can efficiently repair paint chips and restore the look of your surfaces, ensuring they remain appealing and protected.
Tips for Blending the Repaired Area with Surrounding Paint
When addressing paint chips through a touch-up, it’s crucial to ensure that the repaired area seamlessly integrates with the surrounding paint. Here are some effective tips to achieve a smooth and invisible finish.
First, choose a paint color that matches the original as closely as possible. If you have leftover paint from the original job, use that for the best results. If not, consider using a paint pen specifically designed for touch-ups. These pens often come with fine tips that allow for precise application, making them ideal for small chips.
Before applying the paint, clean the chipped area thoroughly to remove any dust or debris. This helps the new paint adhere better and ensures an even application.
Apply the paint in thin layers, allowing each layer to dry completely before adding another. This not only prevents the paint from clumping but also allows you to gradually build up the color to match the surrounding area.
After the final layer has dried, use a soft cloth to gently buff the edges of the repaired area. This will help to feather the paint, softening any harsh lines and blending it more naturally into the surrounding surface.
Finally, consider a clear sealant if the area is prone to wear. This will protect your touch-up and keep it looking fresh for longer. By following these steps carefully, you can achieve a flawless repair that enhances the overall appearance of your space.


