


Restoring a classic car can be a rewarding endeavor, allowing you to breathe new life into a vehicle that holds both historical and sentimental value. The journey of restoration involves numerous steps, but one of the most critical aspects is achieving a stunning finish through precise bodywork. Whether your objective is to bring back the original glory or to customize it to fit your personal style, understanding the restoration process is essential.
Proper restoration not only enhances the aesthetic appeal of your car but also protects it from environmental damage and prolongs its lifespan. The process involves assessing the current state of the vehicle, identifying necessary repairs, and executing detailed bodywork that includes everything from rust removal to paint refinishing. This guide will take you through the key stages of transforming your old car into a head-turning masterpiece.
Throughout this comprehensive guide, you will learn about essential techniques, tools, and materials required to succeed in each phase of the restoration process. Our focus will be on providing practical tips and insights that will equip you with the knowledge needed to tackle bodywork challenges and achieve a professional-quality finish.
Assessing Your Car’s Bodywork Needs
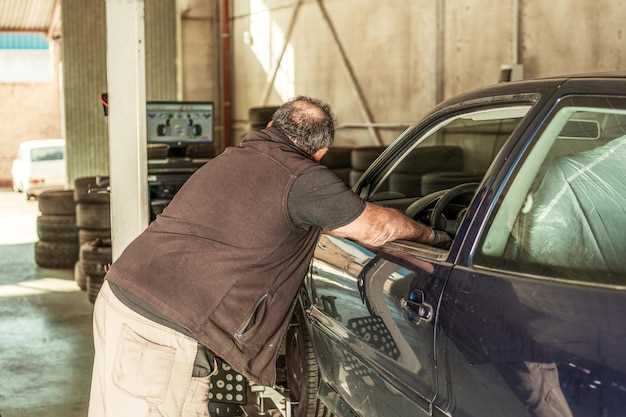
Before embarking on a restoration project, it is crucial to thoroughly assess your car’s bodywork needs. This step involves examining the exterior for damage, rust, and imperfections that could affect the overall appearance and longevity of the vehicle. Start by inspecting each panel for dents, scratches, or paint degradation. Document any visible defects to create a comprehensive restoration plan.
Next, check for signs of rust, particularly in common areas such as the wheel arches, undercarriage, and around the windows. Rust can spread quickly and may require full panel replacement if not addressed early. Use a magnet to identify filler that might be hiding previous repairs. If the magnet does not stick, it could indicate rust or bondo, which may necessitate further investigation or replacement.
Another important factor is alignment. Ensure that all panels fit well together, with even gaps and alignment. Misaligned panels can indicate underlying damage that needs to be repaired before moving forward with cosmetic work. After a thorough inspection, prioritize the repairs based on severity and visibility, allowing you to tackle each issue systematically.
After identifying the necessary repairs, consider the type of finish you want to achieve. Decide whether a full restoration is necessary or if spot repairs will suffice. This consideration will influence your approach to painting, polishing, and any additional bodywork that may be needed.
In conclusion, assessing your car’s bodywork needs is a vital first step in the restoration process. A detailed evaluation will guide you in planning and executing the necessary repairs, ensuring your vehicle looks its best for years to come.
Step-by-Step Process for Repairing Dents and Scratches
Repairing dents and scratches on your car requires a careful approach to restore its full appearance. Follow these steps for an effective bodywork repair process.
Step 1: Assess the Damage
Begin by thoroughly inspecting the affected areas. Determine whether the damage is a dent, scratch, or both. Document the extent of the damage for reference.
Step 2: Gather Necessary Tools and Materials
Prepare your toolkit, including a heat gun, dent puller, sandpaper (various grits), primer, touch-up paint, clear coat, and microfiber cloths to clean surfaces.
Step 3: Prepare the Area
Clean the damaged area with soap and water to remove dirt and debris. Dry the surface completely. If necessary, tape around the damaged area to protect the surrounding paint.
Step 4: Repairing Dents
If the dent is minor, you can use a dent puller or a hairdryer combined with a cold method (like compressed air) to pop it out. For larger dents, you might need to use a specialized repair kit or seek professional help.
Step 5: Sanding the Area
Use sandpaper to gently sand the scratched area. Start with a coarser grit to remove any rough edges, then move to a finer grit to smooth the surface. Be careful not to sand too deep.
Step 6: Applying Primer
Once the area is smooth, apply a thin coat of primer over the repaired dent or scratch. Allow the primer to dry completely before proceeding to the next step.
Step 7: Painting
Using touch-up paint that matches your car’s color, apply a thin layer over the primed area. It may take several coats to match the surrounding area seamlessly. Allow each coat to dry before applying the next.
Step 8: Clear Coat Application
After painting, protect the repair with a clear coat. This step helps to provide shine and durability to the repair. Apply it evenly and let it dry fully.
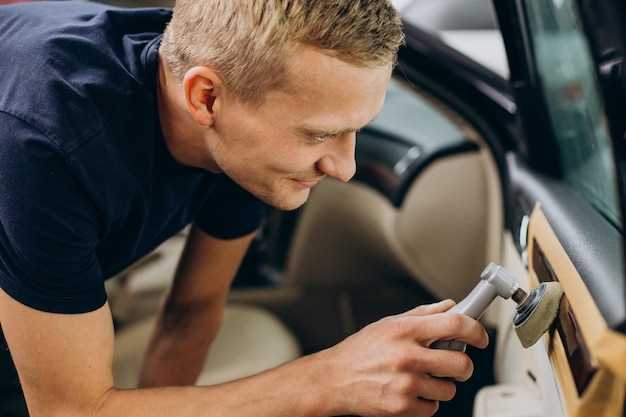
Step 9: Final Touch-up
Inspect the repaired area closely. If necessary, use a fine polish to blend the repair with the rest of the bodywork. Clean the entire area with a microfiber cloth for a polished finish.
Step 10: Regular Maintenance
To keep your car looking its best, regularly wash and wax the repaired areas. This will help protect the paint and maintain its appearance over time.
Choosing the Right Paint and Finishing Techniques
Selecting the appropriate paint is crucial for achieving a high-quality finish in your old car’s bodywork restoration. There are several types of automotive paint available, including acrylic enamel, urethane, and water-based options. Acrylic enamel is known for its vibrant colors and temporary shine, but it may require frequent touch-ups. Urethane paint, on the other hand, offers excellent durability and chemical resistance, making it suitable for long-lasting restorations.
When choosing paint, consider the environment in which the vehicle will be used. If the car will be regularly exposed to harsh conditions, urethane may be the best choice. For those looking for a classic look, traditional enamel paints might be more appealing, despite their limitations.
Finishing techniques also play a significant role in the restoration process. A proper prep work routine, including sanding and priming, sets the foundation for a flawless finish. The use of high-quality primers can prevent rust and ensure better paint adhesion. After applying the base coat, adding a clear coat will enhance sheen and protect against UV damage and scratches.
Another technique to consider is wet sanding after the paint has cured. This process smoothens the surface and eliminates imperfections, resulting in a glass-like finish. Compounding and polishing can further enhance the appearance, providing depth and clarity to the paint job. Remember to utilize appropriate tools and products designed for automotive finishes to achieve professional results.
Ultimately, the choice of paint and finishing techniques will depend on your desired outcome, budget, and the specific needs of your car’s restoration. Investing time in understanding these elements will greatly influence the success of your restoration project.


