


Are your vehicle’s rims starting to look worn out and dull? Over time, rims can accumulate dirt, brake dust, and scratches, causing them to lose their appeal. Fortunately, giving them a fresh look doesn’t require a new set of wheels. With some effort and the right materials, you can repaint your old rims and revive their original luster.
In this article, we will explore effective techniques to rejuvenate your rims, turning them from tired and faded into gleaming assets for your car’s aesthetic. From preparing the surface to selecting the best paint, we will guide you through each step. Emphasizing the importance of proper preparation, we’ll show you how to clean and prime the rims to ensure a durable and flawless finish.
Whether you’re a seasoned DIY enthusiast or a beginner looking to learn something new, this guide is tailored to help you achieve results you can be proud of. Get ready to roll in style with rims that look as good as new!
Step-by-Step Guide to Rim Polishing for a Mirror Finish
Polishing your rims to achieve a mirror finish is a satisfying project that can enhance the overall appearance of your vehicle. Follow these steps to transform your old rims into gleaming masterpieces.
Step 1: Gather Your Materials
Before starting, collect all necessary materials: a soft cloth, a bucket of soapy water, a polishing compound, a polishing pad or buffer, and a clean microfiber towel. Ensure you have a suitable workspace to protect your vehicle and surroundings.
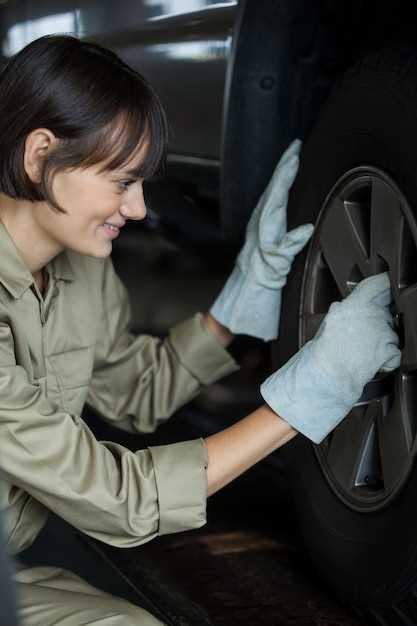
Step 2: Clean the Rims
Thoroughly wash the rims with soapy water to remove dirt and grime. This preparation is crucial as any residue left can cause scratches during polishing. Rinse with clean water and dry completely with a microfiber towel.
Step 3: Inspect for Damage
Before applying any polish, inspect the rims for scratches, scuffs, or other imperfections. Address any deep gouges or damage that may require repair before polishing.
Step 4: Apply Polishing Compound
Select a high-quality polishing compound designed for metal surfaces. Apply a small amount of the compound onto the polishing pad or directly onto the rim. Spread it evenly over the surface for even results.
Step 5: Polish the Rims
Using a polishing pad or buffer, begin to work the compound into the rim. Employ a circular motion, applying light pressure. Focus on one section at a time to ensure thorough polishing. Continue this process until you see a noticeable shine.
Step 6: Buff the Rim
Once polished, use a clean, dry microfiber towel to buff the rim. This step will help to remove any excess compound while enhancing the shine. Pay attention to the edges and corners where residue may accumulate.
Step 7: Final Inspection and Maintenance
After achieving the mirror finish, inspect the rim for any areas that may require additional polishing. Regular maintenance, such as periodic cleaning and polishing, will keep your rims looking like new.
By following these steps diligently, your rims will radiate a brilliant shine, giving your vehicle a polished look that stands out on the road.
Choosing the Right Paint for Rims: Types and Techniques
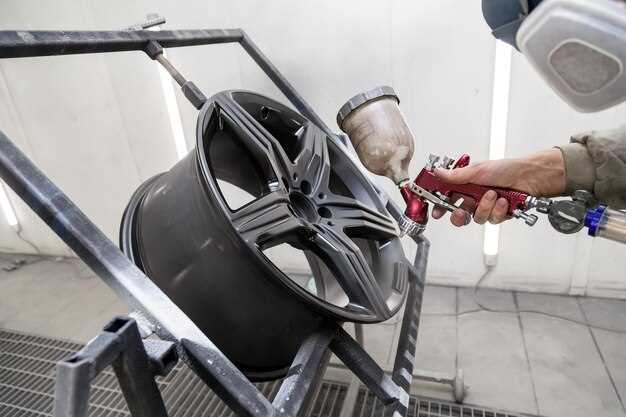
Selecting the appropriate paint for your rims is crucial for achieving a professional-looking finish that not only enhances appearance but also provides protection. There are several types of paint formulated specifically for rims, including spray paints, powder coatings, and hydraulic paints.
Spray paints are popular due to their ease of application and wide availability. They come in various finishes, such as matte, glossy, and satin, allowing for a customizable look. It’s essential to choose a high-heat resistant spray paint designed for metal surfaces, as rims are exposed to intense conditions.
Powder coating is a more durable alternative that involves applying a dry powder to the rims and then curing it in an oven. This technique creates a hard, protective layer that is resistant to chipping and scratching. However, it requires specialized equipment and should ideally be done by professionals.
Hydraulic paint offers a unique method of application that results in a smooth finish and good adhesion. It is often used for more intricate designs, as it allows for detailed airbrush work. When using this type of paint, ensure proper ventilation and follow safety precautions due to the chemical components involved.
Before painting, thorough preparation of the rims is essential. Clean them using a polishing compound to remove any dirt or oxidation, ensuring the paint adheres well. After polishing, apply a primer designed for metal surfaces to enhance paint adhesion and longevity.
In conclusion, the choice of paint type and application technique should align with your desired outcome, durability requirements, and available tools. Proper preparation and execution can transform your rims, giving them a like-new shine that enhances the overall look of your vehicle.
Maintenance Tips to Keep Your Rims Looking Fresh After Restoration
To ensure your newly restored rims maintain their shine and quality, regular maintenance is crucial. Start by washing your rims frequently using a soft sponge and a pH-balanced wheel cleaner. Avoid harsh chemicals that can strip the paint and protect the rim’s surface.
After washing, always dry the rims with a microfiber cloth to prevent water spots and mineral buildup. If your rims have been repainted, be cautious during the cleaning process to avoid scratching the fresh paint. Opt for gentle cleaning brushes specifically designed for rims.
To enhance the protective layer, consider applying a sealant or wax after the restoration process. This creates a barrier against brake dust and road grime. Reapply the sealant every three to six months, depending on driving conditions and exposure to the elements.
Inspect your rims regularly for any signs of damage or wear. Address any scratches or imperfections promptly by touching up with quality paint or a specialized rim repair kit. This prevents rust and further deterioration of the rim’s surface.
Lastly, store your vehicle in a garage or shaded area when possible. UV rays can degrade both the rim’s finish and the protective coatings over time. Following these tips will keep your rims looking fresh and extend their lifespan after restoration.


