


Many people are familiar with the frustration of dealing with scratches on their belongings, whether it’s their car, smartphone, or even furniture. The quest for an effective fix often leads individuals to unconventional solutions, one of which is toothpaste. But does this common household item truly have the capability for scratch removal, or is it merely a myth?
Toothpaste is often touted as a versatile product that can not only help maintain oral hygiene but also serve as a makeshift polishing agent. Its mildly abrasive properties are presented as advantageous for buffing out light scratches, but this begs the question: how effective is it really? The answer may vary based on the type of surface and the depth of the scratch, making it essential to examine the science behind this popular belief.
In this article, we will explore the effectiveness of toothpaste for light scratch removal, discussing various surfaces it may be effective on, the mechanisms behind its supposed success, and expert opinions that shed light on this intriguing topic. By the end, readers will be better equipped to determine if this DIY method is a viable solution or just another case of urban legend.
Understanding How Toothpaste Works on Light Scratches
Toothpaste is often suggested as a home remedy for fixing light scratches on various surfaces, particularly on screens and plastic materials. The effectiveness of toothpaste in this context can be attributed to its mild abrasive properties and the presence of certain polishing agents. When applied correctly, these components can help to smooth out the edges of a scratch, making it less visible.
The abrasiveness in toothpaste comes from ingredients like silica, which can gently buff away the thin layer of material surrounding a scratch. This action may effectively reduce the depth of the scratch, helping to blend it with the surrounding surface. However, it’s important to select a non-gel formula without added colorants or harsh chemicals that may cause further damage.
While some users have found success in removing or minimizing the appearance of scratches using toothpaste, results can vary based on the surface material and the severity of the damage. Lighter scratches are typically more amenable to this method, whereas deeper scratches may require professional repair services or specialized materials designed for scratch removal.
In summary, while toothpaste can serve as a quick fix for minor scratches in a home setting, users should proceed with caution and keep realistic expectations regarding the outcome. Always test the toothpaste on a small, inconspicuous area first to ensure compatibility with the surface being treated.
Step-by-Step Guide for Using Toothpaste in Scratch Repair
Using toothpaste for scratch removal can be an effective home remedy if applied correctly. Follow these steps to fix light scratches on surfaces such as plastic or painted finishes.
Step 1: Gather Your Materials
Collect the necessary items: non-gel toothpaste, a soft cloth or microfiber cloth, and water. Avoid toothpaste with whitening agents or abrasive components, as these can cause further damage.
Step 2: Clean the Area
Before applying toothpaste, ensure the scratch area is clean. Use a damp cloth to wipe away any dust or debris. This will help prevent additional scratches during the repair process.
Step 3: Apply Toothpaste
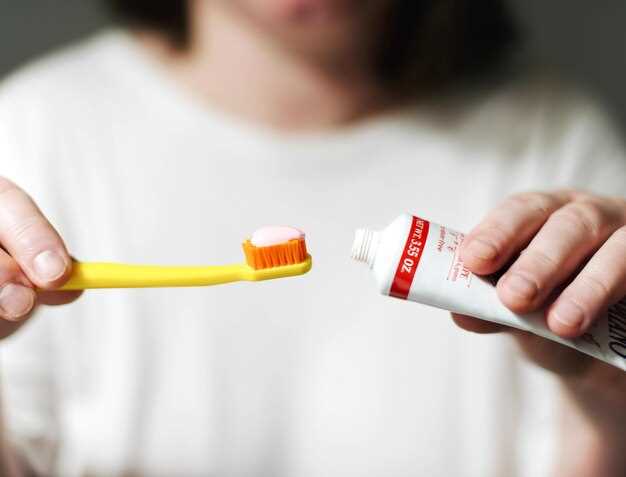
Squeeze a small amount of non-gel toothpaste directly onto the scratch. It’s important to use only a pea-sized amount to avoid excess product.
Step 4: Rub Gently
Using a soft cloth, gently rub the toothpaste into the scratch in a circular motion. Apply light pressure to avoid further scratching the surface. Continue for about 30 seconds to a minute.
Step 5: Wipe Away Excess
After rubbing, dampen a clean section of your cloth and wipe away the toothpaste. Ensure all residue is removed to prevent any dulling of the surface.
Step 6: Assess and Repeat if Necessary
Examine the scratched area. If the scratch is not fully removed, repeat the process until you achieve the desired result. However, be cautious not to overdo it, as excessive rubbing can damage the finish.
Step 7: Final Clean
Once the scratch appears improved, give the area a final clean with a damp cloth. This ensures the surface is free from any leftover toothpaste.
Using toothpaste can be a simple home solution for light scratch removal. However, always test on an inconspicuous area first to ensure compatibility with the surface material.
Common Mistakes to Avoid When Using Toothpaste for Scratch Removal

Using toothpaste as a DIY method for scratch removal can be tempting, but several common mistakes can hinder the process and even cause more damage. First, one must avoid using the wrong type of toothpaste. Whitening or gel toothpaste may contain abrasives that can worsen the scratch or create additional marks. Instead, opt for a non-gel, non-whitening formula to ensure a smoother removal process.
Another mistake is not preparing the home surface adequately before application. Cleaning the area around the scratch is essential to prevent dirt and debris from interfering with the removal. Always ensure the surface is dry and free from contaminants before applying any toothpaste.
Applying too much pressure is a frequent error that can lead to further scratching instead of removal. Gently buff the area using a soft cloth instead of scrubbing vigorously. This minimizes the risk of worsening the scratch while enhancing the chances of a successful removal.
Many people also underestimate the importance of testing toothpaste on a less noticeable area first. This precaution can help you evaluate how the specific material will react and avoid potential damage to the main surface. Always do a small test to gauge effectiveness and safety.
Finally, neglecting to wipe off the toothpaste residual properly can leave a film that detracts from the overall appearance. After you have finished buffing the scratch, use a clean, damp cloth to remove any leftover toothpaste to ensure the home surface looks its best.


