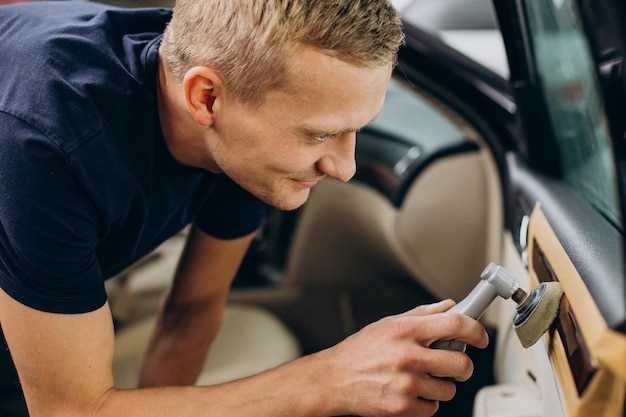
When it comes to enhancing your vehicle’s look, the first step is to restore its original glory. Over time, cars can accumulate dirt, scratches, and dullness that detract from their aesthetic appeal. By investing a little bit of time and effort, you can significantly elevate the appearance of your car, making it stand out on the road.
Caring for your car is not just about maintaining its mechanical functions; it’s also about ensuring it looks its best. Simple improvements like washing, waxing, and interior detailing can breathe new life into a tired exterior and make your driving experience more enjoyable. One crucial aspect many owners overlook is the state of their headlights. Clear, bright headlights not only enhance visibility but also contribute to an overall polished look.
In this article, we will explore practical steps to restore your car’s appearance with easy-to-implement upgrades. From simple DIY projects to effective cleaning techniques, you will discover how to transform your vehicle without breaking the bank. Let’s dive into the details and unveil the potential of your ride.
Enhance Your Trim with Proper Care Techniques
Taking care of your car’s trim is essential for maintaining its overall appearance and value. The trim is often the first part of your vehicle that shows signs of wear and tear, making proper care techniques vital for its restoration.
Start by regularly cleaning the trim with a gentle soap solution to remove dirt and grime. Avoid harsh chemicals that can cause damage. After cleaning, apply a specialized trim restorer to rejuvenate the plastic or rubber materials. These products are designed to penetrate the surface and bring back the original color and shine.
In addition to cleaning and restoring, you should protect the trim from UV rays, which can cause fading and cracking. Use a UV protectant that not only shields against sun damage but also adds a layer of moisture to prevent drying out. This will prolong the life of your trim and keep it looking fresh.
For metal trim, apply a metal polish periodically to prevent rust and corrosion. Choose a polish suitable for your trim material, and follow the manufacturer’s instructions for the best results. Regular polishing can create a protective barrier that enhances shine and keeps the metal looking new.
Inspect your trim regularly for any damage, such as cracks or peeling. Promptly addressing these issues with appropriate repair techniques can prevent further deterioration. Applying a flexible adhesive or sealant can help restore integrity and appearance, especially for trim pieces that have become detached or damaged.
By following these care techniques, you can significantly enhance your car’s trim, ensuring it remains a focal point of your vehicle’s appearance while also extending its lifespan.
Step-by-Step Guide to Restoring Your Headlights

Restoring your headlights can significantly enhance your vehicle’s appearance while also improving visibility. Follow this step-by-step guide to effectively restore your headlights.
Step 1: Gather Your Materials
Before you begin, make sure you have all necessary materials. You will need: headlight restoration kit or sanding paper (800, 1000, and 2000 grades), microfiber cloths, automotive soap, water, masking tape, and a protective sealant. Using quality products ensures better results in the care and trim of your headlights.
Step 2: Prepare the Area
Park your car in a shaded area to prevent the materials from drying too quickly. Clean the headlights with soap and water to remove dirt and grime. Dry them thoroughly with a microfiber cloth.
Step 3: Mask Around the Headlights
Using masking tape, carefully trim around the headlights. This protects your car’s paintwork from scratches and ensures a neat restoration job. A clean area helps maintain a professional appearance post-restoration.
Step 4: Sanding
Begin with 800-grit sandpaper, gently sanding the surface of the headlight in a circular motion. This step is crucial for removing the oxidized layer. Rinse the headlight periodically to remove debris. Once you’ve completed the first pass, switch to the 1000-grit sandpaper for a finer finish, and then repeat with the 2000-grit sandpaper to refine the surface smoothness.
Step 5: Polish the Headlights
After sanding, use a polishing compound included in your restoration kit or a suitable automotive polish. Apply it to a clean microfiber cloth and work it into the headlight in a circular motion. This step helps restore clarity by smoothing out micro-scratches created during sanding.
Step 6: Apply a Sealant
To protect the restored headlights and maintain their shine, apply a protective sealant according to the manufacturer’s instructions. This will help prevent UV damage and prolong the restoration effects, keeping your headlights looking new for longer.
Step 7: Final Touches
Once the sealant has dried completely, remove the masking tape. Ensure that everything is tidy, and enjoy the revitalized appearance of your headlights. Regular care and maintenance will help maintain their condition, enhancing your car’s overall look.
Affordable Accessories to Refresh Your Car’s Look

Upgrading your car’s appearance doesn’t have to break the bank. There are numerous affordable accessories that can significantly enhance its aesthetic appeal. Here are some ideas to consider.
Headlight Restoration Kits are an excellent investment for revitalizing your car’s front-end appearance. Over time, headlights can become foggy and discolored due to exposure to UV rays and contaminants. Using a headlight restoration kit allows you to restore clarity and brightness, improving not only the look but also the safety of your vehicle during nighttime driving.
Seat Covers can dramatically change the interior vibe of your car. Available in various materials and colors, they not only protect your seats from wear and tear but also allow you to express your personal style. Choose fun patterns or sleek, modern designs to breathe new life into your car’s interior.
Another simple yet effective accessory is steering wheel covers. These can provide a fresh look while also improving your grip and comfort during drives. Options range from sporty to luxurious, making it easy to find a cover that matches your style.
Car Mats are often overlooked but can have a big impact on the overall feel of your vehicle. Investing in high-quality, stylish mats can prevent dirt and stains while enhancing your car’s interior aesthetic. Look for designs that complement your seat covers for a cohesive look.
For a personalized touch, consider using vinyl decals. Whether it’s a geometric pattern, a favorite quote, or your favorite sports team logo, these decals can be easily applied and removed, allowing you to refresh your car’s exterior without any permanent changes. Look for materials that are weather-resistant to ensure they stand up to the elements.
Lastly, care products like waxes and polishes can dramatically enhance your car’s paintwork. Regularly applying these products not only protects the paint but also adds a brilliant shine, making your car look brand new again. A clean and well-maintained exterior will always turn heads.
By incorporating these affordable accessories, you can easily transform your car’s appearance while enhancing its functionality. Remember, a little bit of effort can lead to impressive results!


