


When it comes to enhancing the appearance of your vehicle, preparing your car for a professional paint job is a crucial step that cannot be overlooked. A well-executed prep process is essential for achieving a flawless finish that not only looks great but also lasts longer. In this guide, we will delve into the necessary steps to ensure your vehicle is ready for professional painting, focusing on the importance of thorough preparation.
One of the first steps in the prep process is to properly clean the surface of your car. This involves washing off any dirt, grime, or old wax that could interfere with the adhesion of the new paint. After cleaning, inspecting the surface for imperfections like dents and scratches is vital. Addressing these issues early on will help in applying a uniform primer later, which plays a significant role in the painting process.
Once you’ve prepared the surface, the application of a quality primer is the next critical step. Primer serves as a foundation for the paint, promoting adhesion and enhancing the durability of the final coat. A variety of primers are available, and selecting the right one for your car’s needs will contribute significantly to the overall outcome. By following these preparation steps diligently, you are setting the stage for a successful professional painting experience.
Surface Preparation Techniques for Optimal Paint Adhesion
Proper surface preparation is crucial for achieving optimal paint adhesion and a flawless finish. This process involves several key techniques that ensure the surface is ready to receive both primer and paint.
1. Cleaning the Surface: The first step is to thoroughly clean the surface to remove dirt, grease, and old wax. Use a degreaser or a mixture of soap and water. Rinse well and let it dry completely. Any contaminants can hinder paint adhesion.
2. Sanding: Sanding the surface helps to create a rough texture that promotes better adhesion. Choose the appropriate grit sandpaper; typically, 220-grit is suitable for most surfaces. Be consistent in your sanding technique to avoid uneven surfaces.
3. Repairing Imperfections: Inspect the surface for dents, scratches, or rust. Fill any imperfections with body filler and sand it smooth after it dries. This step is vital for achieving a smooth and durable finish.
4. Applying Primer: Once the surface is clean, sanded, and repaired, apply a high-quality primer. Primer not only enhances adhesion but also helps to block stains and provides a uniform base for the topcoat. Ensure that the primer is compatible with the type of paint you plan to use.
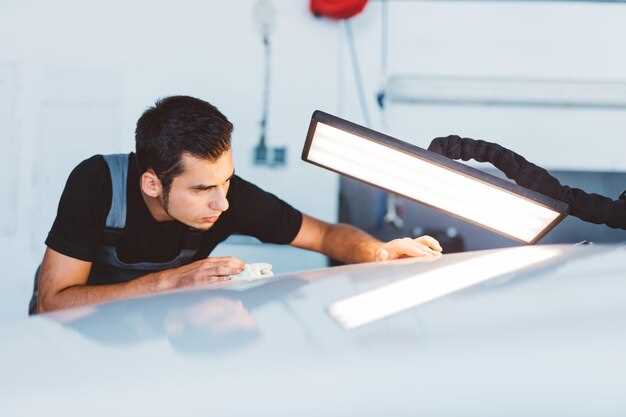
5. Final Inspection: After the primer has dried, inspect the surface again. If necessary, lightly sand the primer to remove any imperfections before applying the topcoat. This final check can significantly affect the overall appearance of the finished paint job.
By following these surface preparation techniques, you can ensure that the paint adheres properly and delivers a long-lasting, professional finish.
Selecting the Right Primer for Your Vehicle’s Needs
Choosing the right primer is essential for achieving a smooth and durable paint finish on your vehicle. Primers serve as a preparatory coat that enhances adhesion, improves durability, and prevents rust. Understanding the specific needs of your vehicle’s surface will lead to better results during the painting process.
When selecting a primer, first assess the condition of the surface to be painted. If the surface is bare metal, a high-quality epoxy or etching primer is ideal as it provides excellent bonding properties and corrosion resistance. On the other hand, if you’re working with existing paint, a sandable primer can help hide imperfections and create a better surface for the topcoat.
Another key consideration is the type of paint you plan to use. If you’re opting for a urethane or acrylic paint, ensure that the primer is compatible with these types. Using the same brand for both primer and paint can often result in strong adhesion and a more cohesive finish.
For vehicles exposed to harsh conditions, such as frequent moisture or extreme temperatures, consider using a high-build primer. This type of primer can fill in small scratches and imperfections and provide a smoother surface, which is crucial for a professional-looking finish. Additionally, it can enhance the overall durability of the paint job.
Lastly, be mindful of drying times and application methods. Some primers can be sprayed, brushed, or rolled on. Always follow the manufacturer’s recommendations for the best results. Properly prepping the surface and selecting the appropriate primer will not only enhance the appearance of your vehicle but will also extend the lifespan of the paint job.
Best Practices for Masking and Protecting Non-Painted Areas
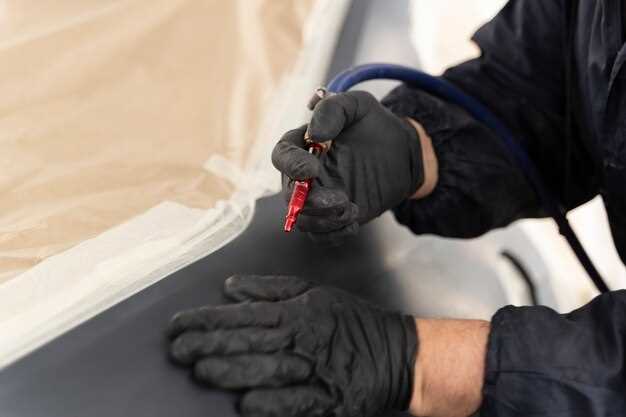
Properly masking and protecting areas of your car that will not be painted is essential for achieving a professional finish. Start by choosing high-quality masking tape designed for automotive painting, as it adheres well and can withstand primer and paint overspray. Ensure you clean the surfaces to which you will apply the tape, as dirt and debris can prevent a good seal and cause paint bleed.
For larger non-painted areas, such as windows and plastic trims, use plastic sheeting or painter’s film. This material will effectively protect against dust and overspray while allowing for easy cleanup. Secure the edges of the sheeting with masking tape to prevent it from lifting during the painting process.
When working around delicate components like headlights and taillights, consider using a combination of masking tape and foam or rubber gasketing. This prevents damage to sensitive areas while still providing a smooth transition at the masking edges. Remember to cover any surfaces that may be exposed to primer or paint, ensuring complete protection before starting your prep work.
After masking, double-check all areas to confirm that the tape is securely adhered and that there are no exposed edges. This creates a barrier that effectively contains the primer and paint, ensuring clean lines and a professional-looking finish. Take your time during this step, as it sets the foundation for the entire painting process.


